EDV:OpenAFS/Windows: Difference between revisions
| Line 36: | Line 36: | ||
On Windows7 you need to run this script with Administrator privileges: right click on the file and select "Run as administrator"}} |
On Windows7 you need to run this script with Administrator privileges: right click on the file and select "Run as administrator"}} |
||
[http://www-01.ibm.com/support/docview.wss?uid=swg21240069 Uninstalling the Microsoft Windows Loopback Adapter] |
HowTo: [http://www-01.ibm.com/support/docview.wss?uid=swg21240069 Uninstalling the Microsoft Windows Loopback Adapter] |
||
=== OpenAFS === |
=== OpenAFS === |
||
Revision as of 10:24, 7 December 2012
Generelle Installationsanweisungen und Anmerkungen:
Upgrade auf Version 1.7.XX:
Beim Upgrade von Version kleiner / gleich 1.6.xx - bitte den alten Client deinstallieren!
Ab Version 1.7.X arbeitet der AFS Client für Windows mit einem nativen Filesystem Treiber und nicht mehr wie bisher über die Funktion SMB/Loopbackadapter. Deshalb ist es notwendig bei einem Upgrade des Clients auf Version 1.7.XX, und zwar nach der Deinstallation des Clients, den Loopbackadapter zu entfernen. Dies funktioniert am Besten über:
Eigenschaften des Loopbackadapters > Karteikarte Treiber > Deinstallieren/Entfernen
Dieses Fenster findet man entweder im Gerätemanager, oder unter Eigenschaften von Netzwerk.
Installation des AFS Authentication Gui Tool, Installation ohne Kerberos/Heimdal:
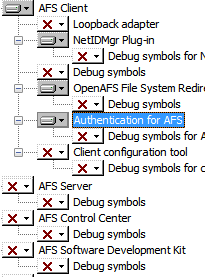
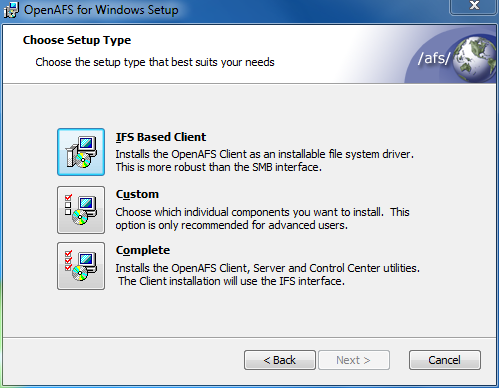
Damit man auch ohne Kerberos oder Heimdal einen Token erzeugen kann, gibt es immer noch die Möglichkeit das AFS Authentication Tool zu installieren. Hierfür ist es notwendig die Installation manuell/custom durchzuführen, und die Auswahl der einzelnen Programmteile wie folgt zu treffen:
Client-Software
OpenAFS for Windows depends on a third party Kerberos 5 implementation for network authentication.
There are two supported options: MIT Kerberos for Windows and Heimdal Kerberos. For Windows7 64 Bit use Heimdal Kerberos on all other Systems the MIT Kerberos works well.
To access the AFS-Server you need to download and install the appropriate OpenAFS and Kerberos Software (sometimes tricky),
or use this KIP-AFS_Windows Installation Script, which automatically download, install and configure all needed software for you (recommended).
| IMPORTANT: Use only for a fresh installation, or uninstall the old Client-Software completely first!
Remove also the Loopback Adapter if present in the Device Manager. On Windows7 you need to run this script with Administrator privileges: right click on the file and select "Run as administrator" |
HowTo: Uninstalling the Microsoft Windows Loopback Adapter
OpenAFS
For the latest releases visit the Homepage OpenAFS for Windows
Download for 32-bit Windows
Downloads for 64-bit Windows
Both installers must be installed on 64-bit systems
>> Kerberos (MIT)
KFW 3.2.2 includes Network Identity Manager 1.3.1
For further information and latest releases see: MIT Kerberos for Windows (KFW)
Download for 32-bit Windows
Download for 64-bit Windows
On 64-bit Windows install both the 32-bit and 64-bit MSI packages
>> Kerberos (Heimdal)
For further information and latest releases see: Heimdal Kerberos 5
Download for 32-bit Windows
Download for 64-bit Windows
For Heimdal Kerberos you need to install the Network Identity Manager
>> Network Identity Manager
Network Identity Manager version 2.0 will be its own distribution that upgrades the Network Identity Manager components installed by KFW (MIT-Kerberos).
For further information and documentation see: Network Identity Manager Homepage
Download for 32-bit Windows
Download for 64-bit Windows
Installation
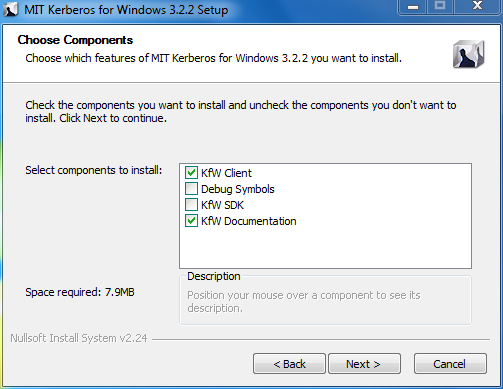
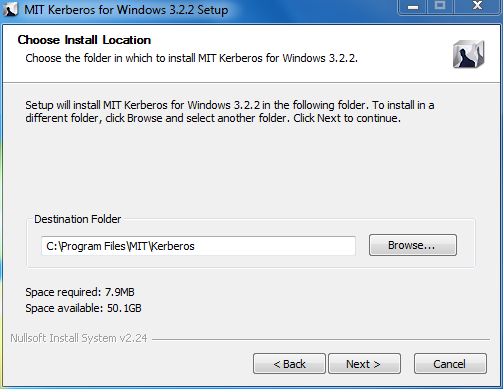
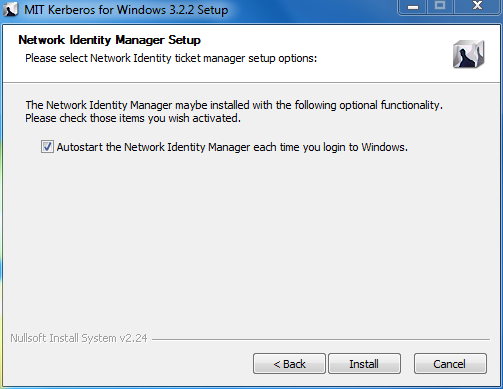
Kerberos Setup
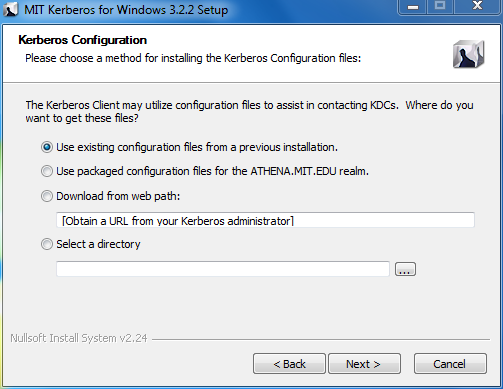
Example installation with MIT Kerberos for Windows
If you select the option
- Download from web path:
then the web path for the config file is:
http://printer.kip.uni-heidelberg.de/afsconfig/krb5.conf
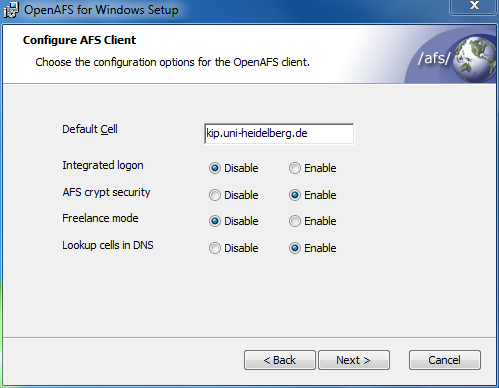
OpenAFS for Windows Setup
Related config files under: http://printer.kip.uni-heidelberg.de/afsconfig
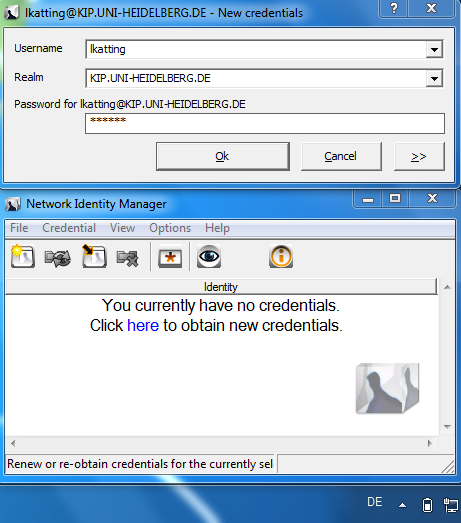
Client-Connection
After installing the AFS-Software you need to:
If the authentication was successful, you are able to access your data by
- Click: Start > Computer > Map network drive (in the tool-bar)
- In the "Map Network Drive window" choose an available drive letter from the drop-down list and type the name of the folder to map.
The folder can be any (accessible) path starting with \\afs
Examples:
( the shortcut \\afs\kip is also possible )
- for the top level view: \\afs\kip.uni-heidelberg.de
- for your Home directory: \\afs\kip.uni-heidelberg.de\user\<USERNAME>
Click the "Reconnect at logon" checkbox if this network drive should be mapped permanently.
You can map multiple folders to different drive letters, in order to organize a quick and convenient file access.
It is also possible to access the data temporary (on the fly) without dedicated drive-mapping by typing:
" \\afs\kip\<your_location> " in the explorer address bar.
